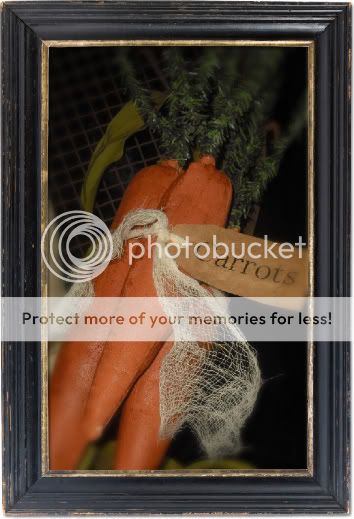
Hello again! I wanted to share a tutorial for making some primitive carrots to go along with your primitive bunnies. Click on my older post in February to see how the bunnies were made and add these carrots to make your spring arrangement really "pop."
Here we go again.....
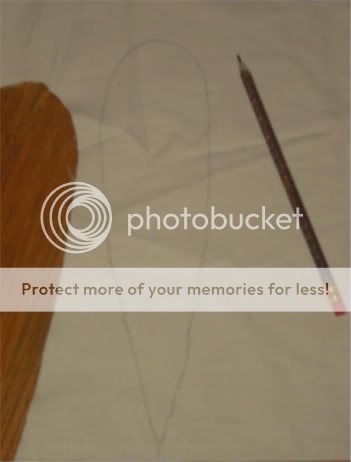
First, I drew a carrot on this muslin with a pencil. I doubled the muslin so when I cut it out there will be two peices that are the same size and shape.
Next, I cut out the carrot leaving a quarter inch space around the outside. Stitch around the carrot right on the pencil marks. Leave an opening in the end the greenery will go in.
Turn the carrot inside out and stuff it with poly fill.
Next, find some greenery to stuff in the end of your carrot. I have some leftover primitive pine from Christmas that will do the trick. Use your imagination here, almost any type of greenery will work.
I used my wire cutters to snip off three pieces of this pine to use in the end of the carrot.
Stuff your greenery in the end. I then used a needle and tread to bunch the top together around the greenery and sewed it up.
Next, I used some acrylic craft paint to paint the fabric orange with a brush. This is "433 Terra Cotta" by Folk Art. I prefer to use muslin painted, instead of orange fabric because the paint helps to make it look old and makes it stiff. But you could use orange or orange patterned fabric to make these carrots and then skip the painting step.
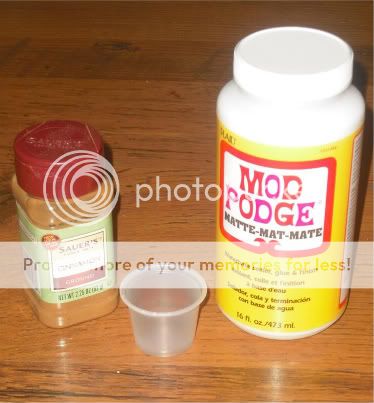
While the paint is drying, I mix cinnamon and Mod Podge in a disposable cup. You can use any spice you like here, it just grubbies the carrot up and makes it look more real.
Now take a paint brush and brush your Mod Podge mixture all over the carrot (not the greenery though). Let this dry and your carrot is finished. I do a bunch of carrots at a time...it makes each step go by quicker. Now all you have to do is decorate them. I made some "Carrot" tags, bunched them together and tied cheese cloth around them. Check out my older tutorial in February titled Primitve Bunnies to see how I made the tags. Then just stick your carrot bunches in arrangements or sit them out in bowls or all by themselves. Use your imagination! They really make everything look so much like spring with the bright color!
Thanks for taking a peek...let me know what you think!
**Christina**


Oh my gosh those look so real I think even my bunnies would be fooled!!! Thanks for sharing:)
ReplyDeleteI make these every year for Easter to....love how they look in your arrangement..
ReplyDeleteThanks for sharing...
Hugs,Trena
i love those carrots!!! i'm gonna have to make some.
ReplyDeleteThanks for the tutorial.
ReplyDeleteI Love them!!!
~Janet
Thank you so much for this...I think maybe even I can do it!
ReplyDeleteThose are so cute! Great Tut!!
ReplyDeleteLove these carrots. They are on my must do soon list!!
ReplyDeleteGreat tutorial! Thanks so much!!
ReplyDeleteGreat tutorial! I agree with you, I prefer to make my carrots using painted muslin or osnaburg instead of orange fabric.
ReplyDeleteThanks, Christina! Love the carrots!
ReplyDeleteLove your carrots. Thanks for sharing
ReplyDeleteI love to make things and your tutorial was prim perfect!
ReplyDeleteI can't wait to try making these. Too cute!
Thanks for sharing!
Tanya ~ new blogger
www.friendshipcrossing.blogspot.com
I love the painted look better, too. I'm getting in the spring mood! Come on warmer weather!
ReplyDeleteChristina, Thank you for the sweet comment you left on my blog, tubing was fun but cold.
ReplyDeleteI love the way you showed step by step to make the prim carrots. I am going to try this. You are such a peach to show us girls this.
I can't wait for Spring, I have the fever!!!
Prim Hugs friend,
Tricia
I love your tutorials. Thanks for sharing. Hugs, Valerie
ReplyDeleteHi, Christina! I just finished up my prim carrots, using your tutorial as a guide. Thank you so much! I love you site, and wanted to let you know that I linked up to your tut through my site (and shared many pics)here: http://primnpropershoppe.blogspot.com/2011/04/fresh-picked-carrots.html Blessings, ~Morgan♥
ReplyDeleteOH! And ps- I intend to try your prim bunnies very soon, too! Thank you! :D
ReplyDeletewow Love these. How can I see more of your fabulous ideas? Thanx
ReplyDeletewow Love these. How can I see more of your fabulous ideas? Thanx
ReplyDeleteThank you for the tutorial - want to make some carrots! xoxoxo
ReplyDeleteObrigada pelo tutorial! Seu trabalho é lindo!!!
ReplyDeleteI'd like a pattern for these if available
ReplyDeleteYou are so talented , would never be this talented . I'm a buyer . Lol
ReplyDelete